|
|
|
Front Brake Maintenance
The CB 450 front brake is a hydraulic operated caliper/disc type. This type brake will provide reliable operation and excellent braking qualities at much higher operating temperatures than the drum type brake.
When the brake lever is applied, brake fluid transmits the pressure to the brake piston in the caliper, pressing the friction pads against the disc. Brake fluid is a medium for transmitting pressure and plays a vital role in the brake system. Therefore when the scheduled brake maintenance is performed, it is imperative that the front brake system is inspected to insure that there is no fluid leakage.
As the friction pads wear, additional fluid is taken into the system from the fluid reservoir to compensate for the friction pad wear. Because of this feature, the disc brake is self adjusting and the brake control lever free travel will remain constant once the free travel has been established and providing the hydraulic system is free of air.
If the control lever free travel becomes excessive, and the friction pads are not worn beyond the recommended limit , there is probably air in the brake system and it must be bled.
Replenishing Brake Fluid
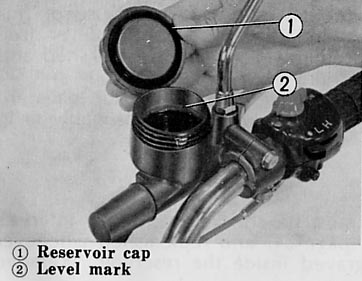
The brake fluid level in the reservoir must be checked at regular intervals as in the MAINTENANCE SCHEDULE and replenished whenever the level is below the level mark engraved inside the reservoir. Remove the reservoir cap (1) and fill the reservoir to the lever mark. Use only brake fluid which is designated "DOT 3" on the container. "DOT 3" brake fluid meets the SAE J1703 specification. Outside the U.S.A., Use SAE J1703 brake fluid. Tighten the reservoir cap securely.
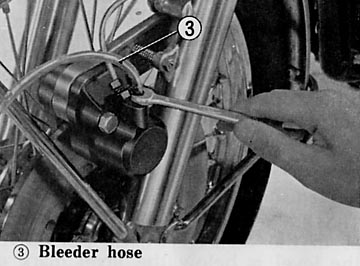
Bleeding the brake system
The brakes must be bled with great care subsequent to work performed on the brake system, when the lever becomes soft or spongy or when lever travel is excessive. This procedure is best performed by two mechanics.
Replenish fluid in the reservoir when bleeding is completed. Reinstall the diaphragm, washer and reservoir cap and tighten.
When the hydraulic brake system has been drained, it should be first filled as outlined below.
NOTE:
Brake pad wear will depend upon the severity of usage, type of driving and condition of the roads. It may be expected that the pads will wear faster on dirty and wet roads. Visually inspect the pads during all regular service intervals to determine the pad wear.
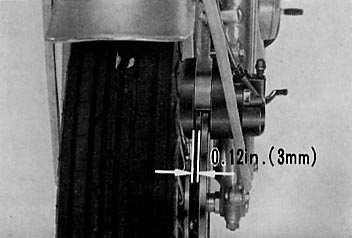
The remaining thickness of pad linings can be determined by measuring the clearance between the face of the caliper inner housing and the brake disc by pressing the inner housing toward the disc. If the clearance is less than 0.12 in. (3.0 mm), replace with new pads as a set.
NOTE: Use only HONDA genuine replacement friction pads offered by authorized HONDA dealers. When service is necessary on the brakes, consult your HONDA dealer.
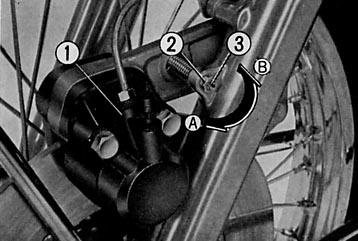
Brake Caliper Adjustment:
Whenever the brake pads are replaced, the brake caliper (1) must be adjusted. This adjustment is made in the following manner, so there is a small clearance between the fixed friction pad and the brake disc.

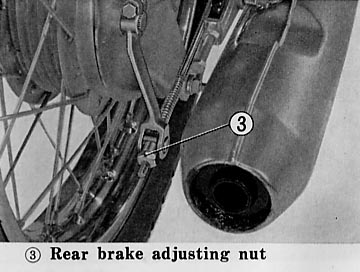
NOTE: Make sue that the cut-out on the adjusting nut is seated on the brake arm pin after the final adjustment has been made. If the rear wheel assembly has been moved forward or rearward, during drive chain adjustment, the rear brake may require adjustment. Whenever the rear wheel is removed, examine the brake shoes for lining thickness and even wear.